4.4 Capturing images
You can capture user images for a person using an attached webcam, or by uploading an existing photograph. This feature is available in the Edit Person and Add Person screens.
4.4.1 Requirements for image capture
MyID requires a webcam with a resolution of at least 640x480. If the camera supports a higher resolution, MyID uses the full resolution available.
You can adjust the brightness and contrast of the image on the webcam feed only if the camera itself allows it.
MyID can access the camera only if it is not being used by another application; make sure the camera is not being used before attempting to capture an image.
If for any reason there are no compatible webcams available, the Image Capture screen will still allow you to upload an existing image file.
Image capture is supported on all browsers supported by the MyID Operator Client – see section 2.1.1, Supported browsers.
Note, however, the following limitations when using Firefox:
-
The image capture resolution is limited to 640x480.
-
You cannot set the brightness or contrast.
4.4.2 Configuring image capture
To enable or disable image capture in the MyID Operator Client, set the Image Capture option on the Video tab of the Operation Settings workflow. If you set this option to Yes, you can capture images; if you set this option to No, the images already captured appear read-only, and you cannot capture new images or update existing images.
The image capture configuration options (on the Video tab of the Operation Settings workflow) control how you can crop images in the MyID Image Editor.
-
To set a fixed size image, set the Image Crop Height and Image Crop Width options to the size (in pixels) of the image you want to upload. The MyID Image Editor displays an initial cropping rectangle. You can move and resize the cropping rectangle on the image to any position or size, automatically maintaining the aspect ratio of the fixed image size. When the MyID Image Editor uploads the resulting image to the server, it is scaled up or down to match the Image Crop Height and Image Crop Width.
Note: These settings take precedence over the other image crop settings.
-
To limit the uploaded image to a maximum height and width, set the Validate Image Size option, then set the Maximum Image Height and Maximum Image Width settings (in pixels). You can move and resize the cropping rectangle on the image to any position or size. When the MyID Image Editor uploads the resulting image to the server, it is scaled down to within the Maximum Image Height and Maximum Image Width, maintaining its aspect ratio; if the image is the same size or smaller, it remains the same size.
Note: If Validate Image Size is set to No, the Maximum Image Height and Maximum Image Width settings are ignored.
-
To fix the aspect ratio of the image, set the Image Crop Aspect Ratio to the required image aspect ratio (width:height). For example, for a UK passport photo ratio, use 35:45. The MyID Image Editor displays an initial cropping rectangle. You can move and resize the cropping rectangle on the image to any position or size, automatically maintaining the specified aspect ratio.
You can combine this option with the Validate Image Size option to specify an image of a particular aspect ratio with a maximum size. If the Image Crop Aspect Ratio is, for example, 1:2, and both the Maximum Image Height and Maximum Image Width settings are 1000, the maximum image size that respects both the aspect ratio and the maximum dimensions is 500x1000.
You can also configure the compression on the resulting images uploaded to the server:
-
JPEG Compression Ratio – set this to the compression value from 1 to 100. The default is 90. The lower the number, the greater the compression.
Examples:
-
You want all uploaded user images to be exactly 600x800 pixels.
To do this, set the Image Crop Height to 800 and the Image Crop Width to 600.
The operator can then capture images of any size, crop them to a fixed 3:4 aspect ratio (calculated from the fixed width and height), and when they are uploaded to the server, the images are rescaled to exactly 600x800. Low resolution images (for example, from a 640x480 webcam) are scaled up, and high resolution images (for example, from a 4K webcam) are scaled down.
-
You want all uploaded images to be in a 3:4 aspect ratio. You are happy with low resolution images, but to save space, you want images to have a maximum size of 1200x1600.
To do this, set the Image Crop Aspect Ratio to 3:4, the Validate Image Size option to Yes, the Maximum Image Height to 1600 and the Maximum Image Width to 1200.
The operator can then capture images of any size, crop them to a fixed 3:4 aspect ratio, and when they are uploaded to the server, if the images are larger than 1200x1600, they are rescaled to exactly 1200x1600. Low resolution images (for example, 300x400 images from a 640x480 webcam) are uploaded without scaling.
-
You want square images, but have no requirements for size.
To do this, set the Image Crop Aspect Ratio to 1:1.
The operator can then capture images of any size, crop them to a fixed 1:1 aspect ratio, and when they are uploaded to the server, the images are uploaded without scaling.
4.4.3 Capturing an image from a webcam
To capture an image from a webcam:
-
Click the camera icon on the user image:

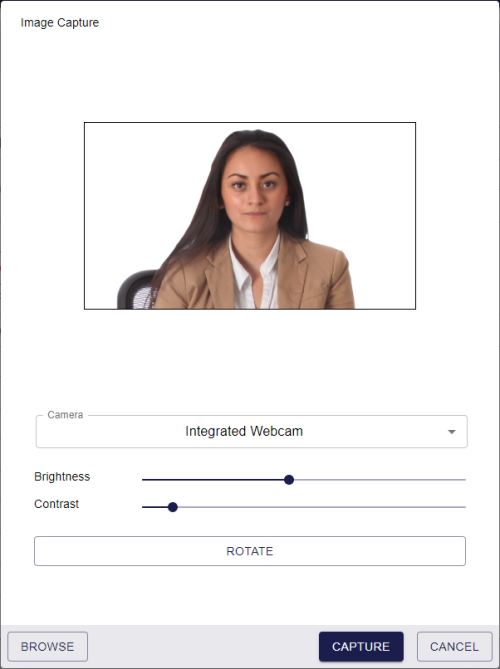
The Image Capture dialog appears.
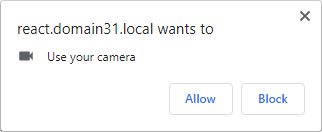
Your browser may prompt you to allow access to the camera. For example:
Firefox:

Chrome:
-
Select your webcam from the Camera drop-down list, if you have more than one.
For example, you may have a laptop with an integrated camera, but also a high-quality external camera that you want to use to capture user images.
MyID remembers your camera selection the next time you open the Image Capture dialog.
-
Set the following options:
-
Brightness – adjust the brightness of the image.
-
Contrast – adjust the contrast of the image.
If you change these settings, MyID remembers the settings for the particular webcam the next time you open the Image Capture dialog.
Note: These options are available only if your webcam supports them, and are not available if you are using the Firefox browser.
-
-
If necessary, you can click ROTATE to rotate the image by 90°.
MyID remembers your preferred rotation setting the next time you open the Image Capture dialog.
-
Click CAPTURE.
The MyID Image Editor opens.
See section 4.4.5, Cropping and editing user images for details of working with the image.


4.4.4 Uploading an existing image file
To upload an existing image:
-
Click the camera icon on the user image:
-
Click BROWSE.
The file dialog opens.

-
Select the image you want to upload.
You can choose from the following file types:
-
JPEG (*.jpg, *.jpeg)
-
Bitmap (*.bmp)
-
Graphics Interchange Format (*.gif)
-
Portable Network Graphics (*.png)
If you select a file of the wrong type, MyID displays an error.
-
-
Click Open.
The MyID Image Editor opens.
See section 4.4.5, Cropping and editing user images for details of working with the image.

4.4.5 Cropping and editing user images
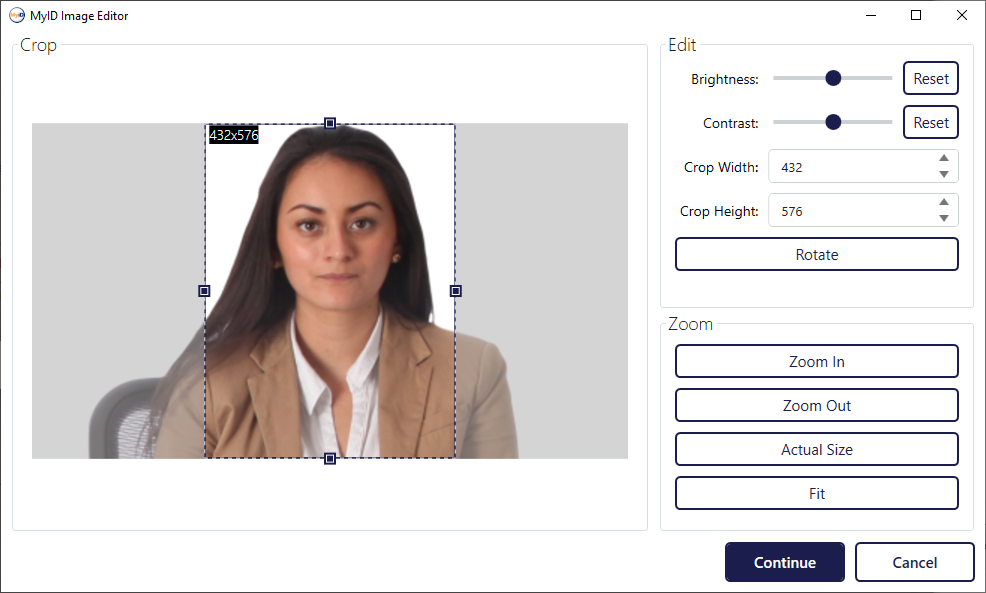
The MyID Image Editor appears when you have captured a webcam image or uploaded an existing image file.
To crop and edit the image:
-
Select the crop area.
If you have set the Image Crop Height and Image Crop Width options, or the Image Crop Aspect Ratio option, the editor displays an initial crop selection as large as possible while respecting the fixed aspect ratio.

You can resize the crop selection, but it automatically maintains its aspect ratio.
If you do not have these options set, the editor does not display an initial crop selection.

Click and drag on the image to select the part of the image you want to use.
Once you have a selection, you can modify it.
-
To change the size of the selection:
-
Click and drag the sizing handles.
-
Hold down the ctrl key and roll the mouse wheel.
-
Use the Crop Width and Crop Height fields to specify the size of the selection.
-
-
To move the selection, click within the selection and drag it.
-
-
Set the following options:
-
Brightness – adjust the brightness of the image.
-
Contrast – adjust the contrast of the image.
-
-
To rotate the image by 90°, click Rotate.
Note: When you rotate the image, it resets the crop settings.
-
To allow you to make accurate selections, you can adjust the zoom level:
-
Zoom In – click to zoom in on the image. You can scroll around the image within the editor.
-
Zoom Out – click to zoom out of the image.
-
Actual Size – click to display the image at its actual pixel size.
-
Fit – fit the image within the editor. This is the default setting.
-
-
Once you are happy with the image, click Continue.
The MyID Image Editor copies the resulting image to the form.
Note: The image is not uploaded to the server until you click SAVE.

4.4.6 Troubleshooting image capture
-
Unable to click on the camera icon
If you cannot click the camera icon to launch the image capture control, check that the Image Capture configuration option is set.
See section 4.4.2, Configuring image capture for details.
-
Problem connecting to a camera
If you see a message similar to the following:
A problem has occurred when connecting to the camera.
Click Cancel, check the camera is operating correctly and not currently in use and then start Image Capture again.This may be caused by another application using the camera. Make sure there are no other applications or browsers currently using the camera. Alternatively, this may be caused by a problem within Windows. Check the Windows Device Manager to ensure that the camera is enabled.
-
Unable to find a camera
If you see a message similar to the following:
A compatible camera has not been found
This means that MyID has been unable to find an attached camera that supports the minimum requirements (640x480 resolution). You can attach an external camera that meets the requirements.
Note: If for any reason MyID cannot connect to a compatible webcam, the Image Capture screen will still allow you to upload an existing image file.
-
Unable to connect to the MyID Client Service App
If you see a message similar to the following when opening the MyID Image Editor:
OC10006 MyID Client Service error
Unable to communicate with MyID Client Service. Ensure it is runningThis may be caused by the MyID Client Service App not running; this app provides the image editing capabilities. Make sure the MyID Client Service App is running and try again.
-
Out of memory
If you see a message similar to:
OutOfMemoryException
This may be caused by attempting to process very large images on a 32-bit operating system. Either use smaller images or carry out your image capture work on a 64-bit operating system.
-
Please wait... message displayed
If the MyID Image Editor does not open, and a Please wait... message is displayed instead, check that you have the latest version of the MyID Client Service installed.